In this article, we will explain how to turn on and off ICO, the connected water analyser that allows you to monitor your water quality in real time. Whether you are a new user or just looking to refresh your memory, these simple steps will help you use your device effectively!
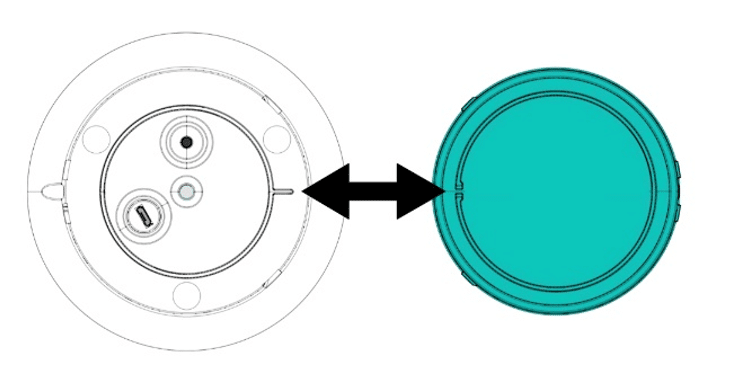
The procedure for switching on ICO Pool and ICO Spa varies according to the model of your unit. If you don't know which model your ICO is, you can check the information on the packaging for the name of your ICO. Otherwise, remove the top cover:
Before switching on your ICO connected water analyzer, make sure your hands are clean and dry, so as not to dampen the inside of ICO. Next, take the opening tool supplied with ICO and open the top cover at the small notch.
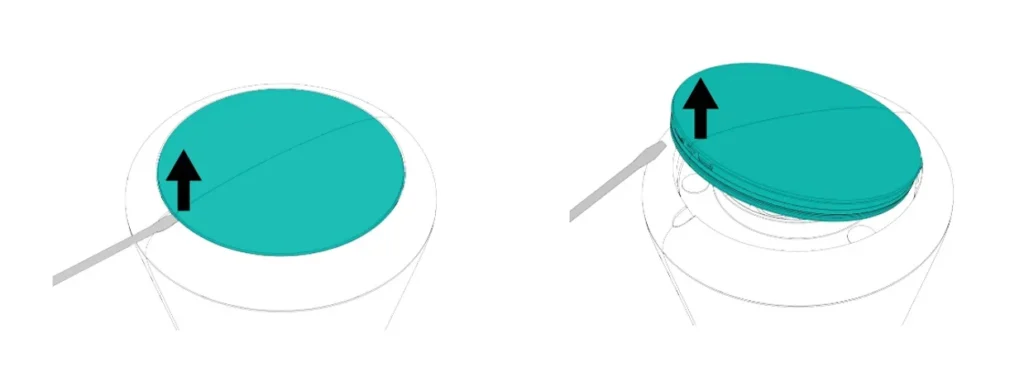
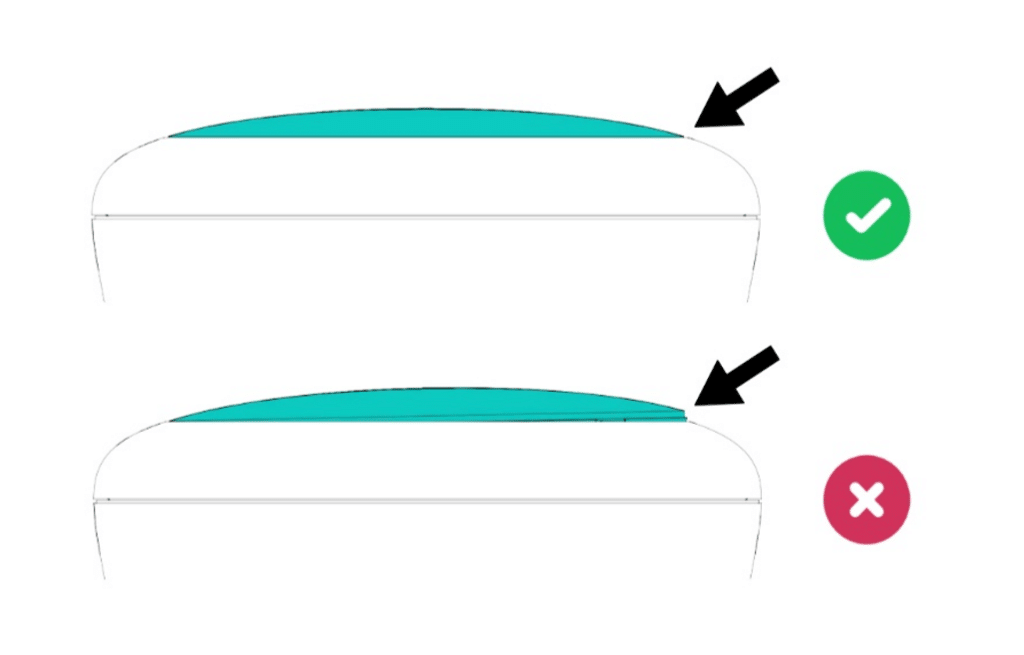
Then close ICO. When reassembling, align the notch in the cover with the keying pin on ICO to ensure a watertight seal.
Make sure that the ICO is closed before putting it in the water. For our tips on opening and closing ICO, click here.
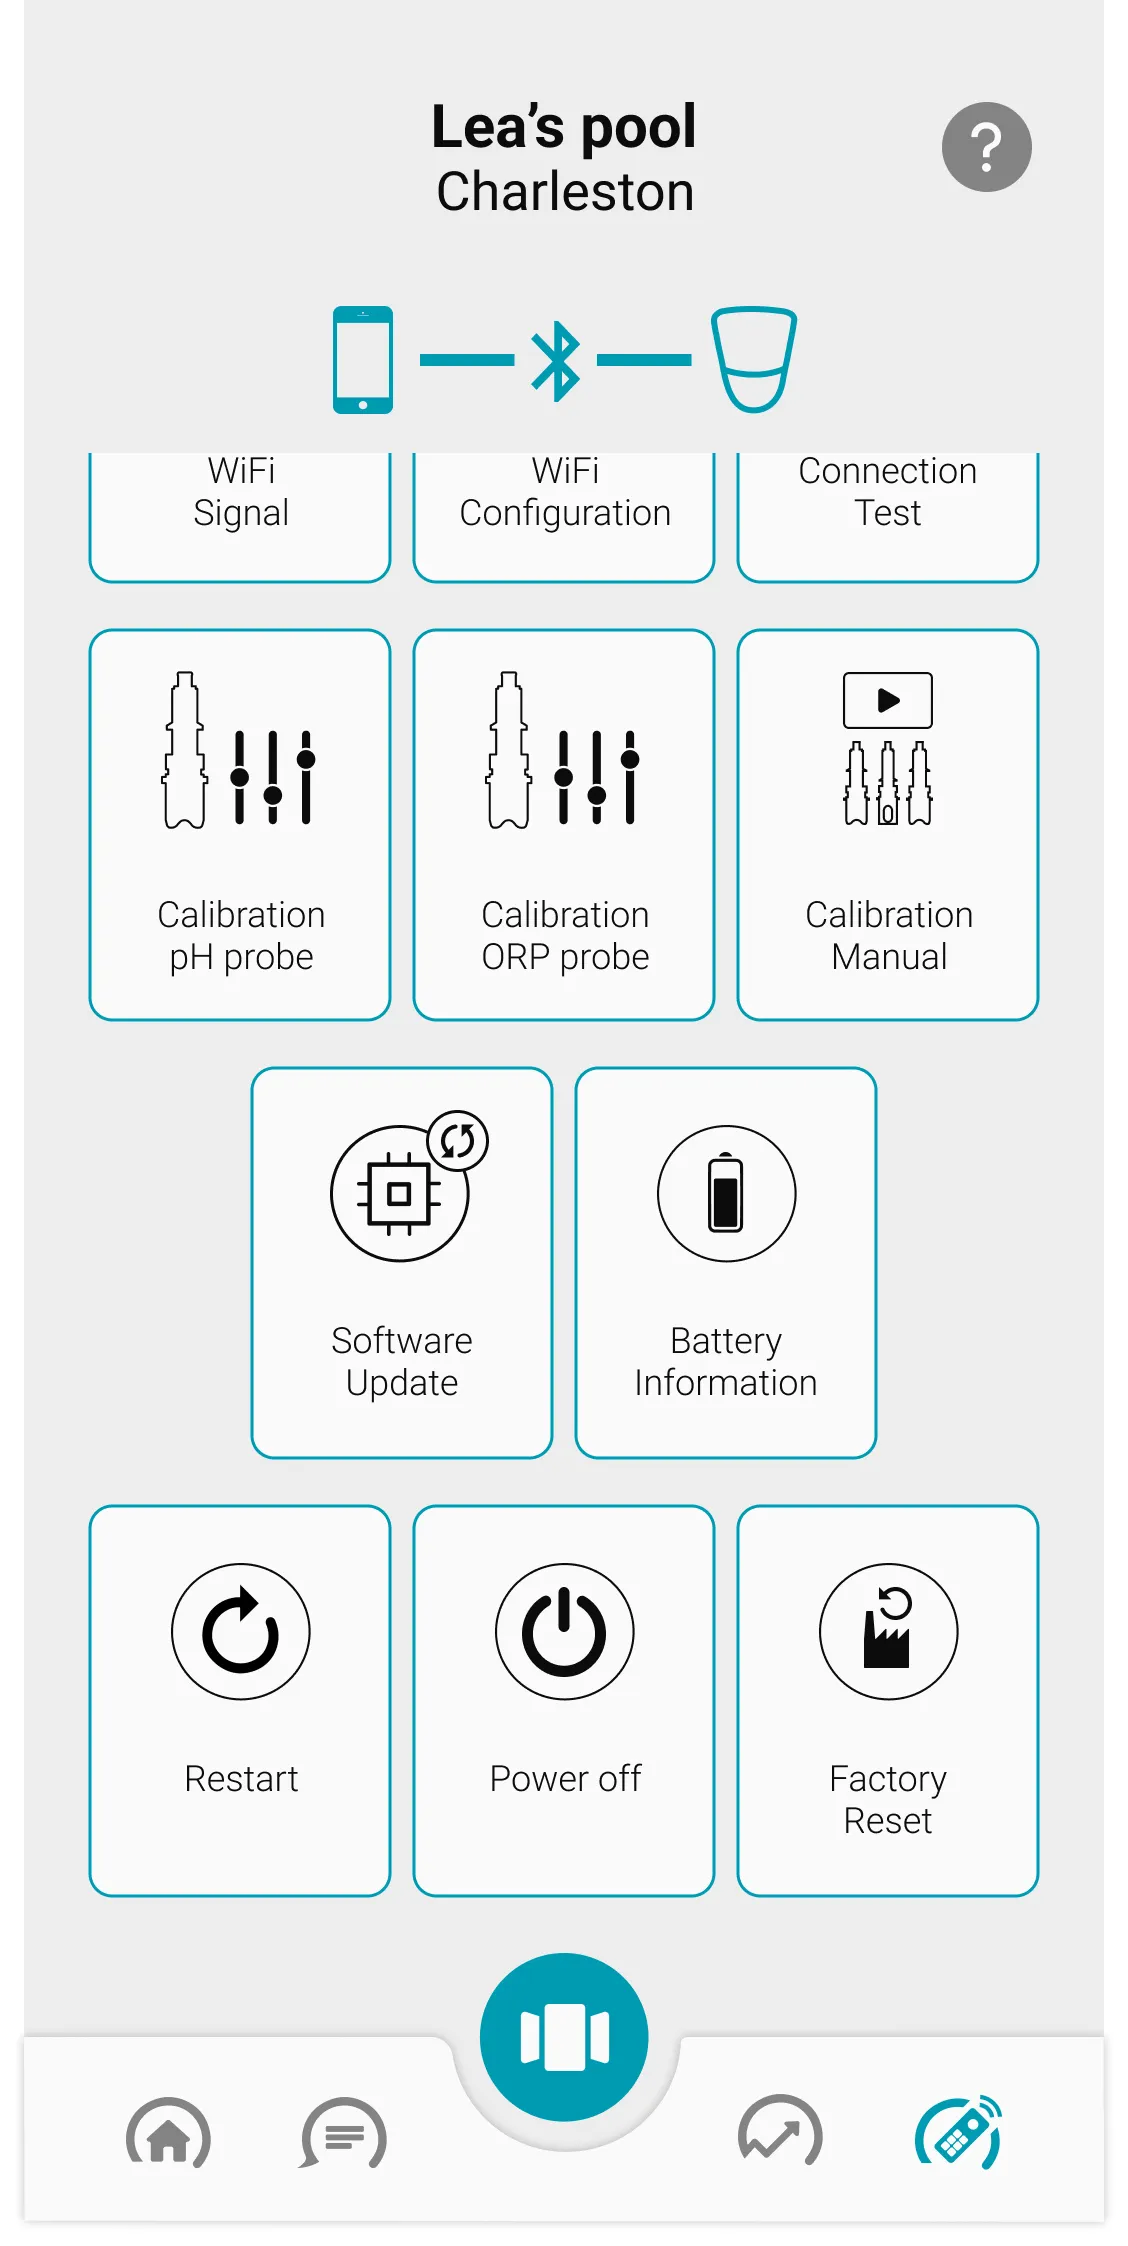
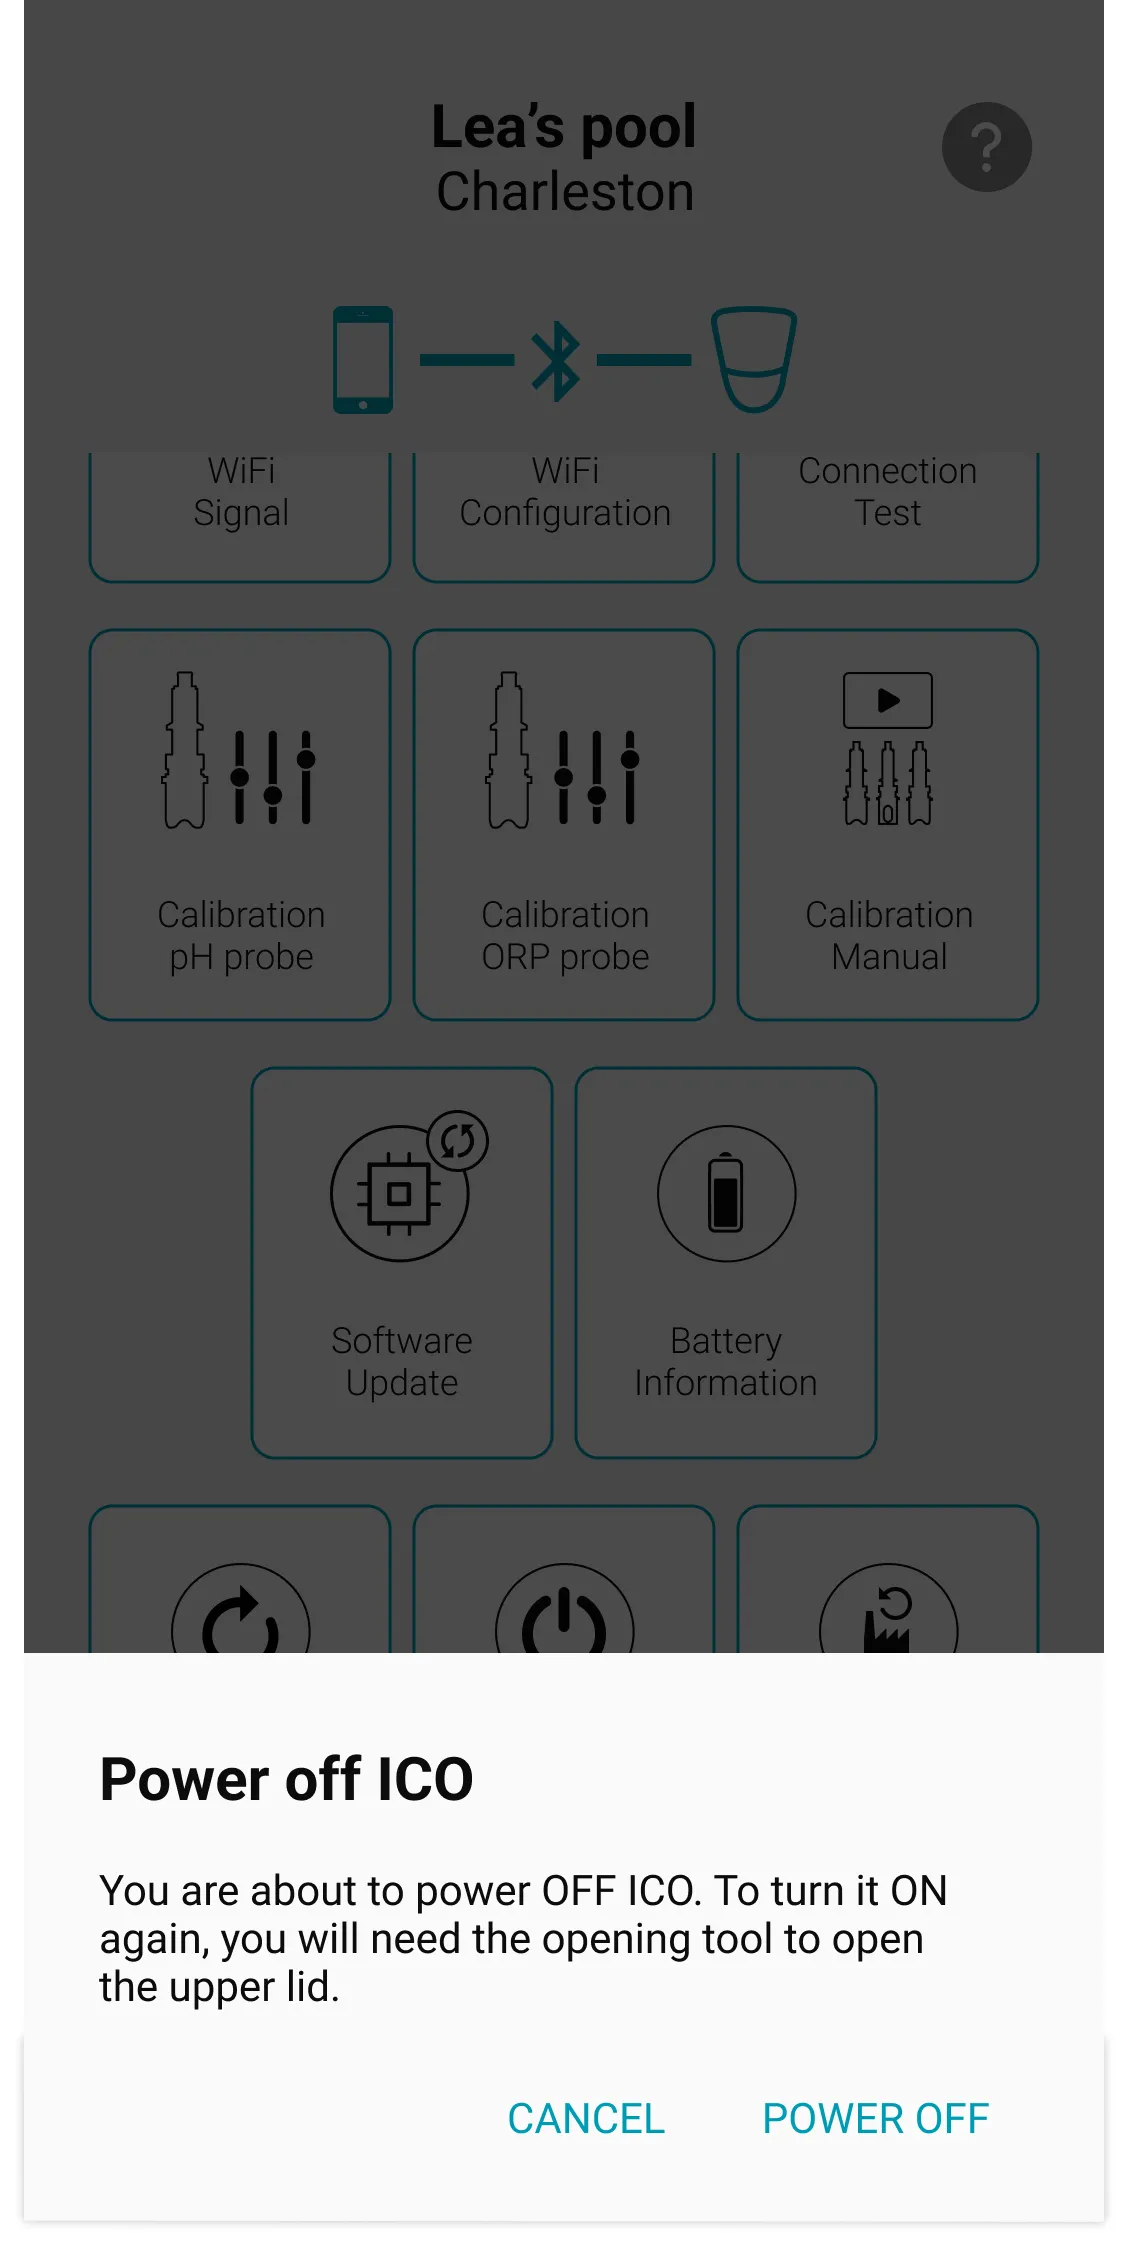
ICO devices can be switched off from your ICO application, or directly on the device itself. Here are the detailed procedures.
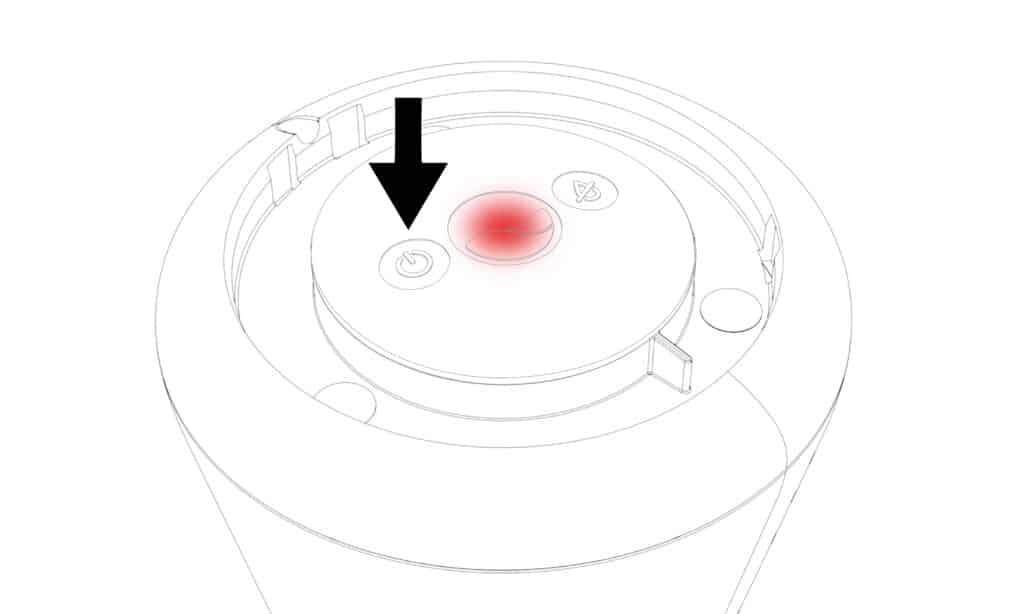
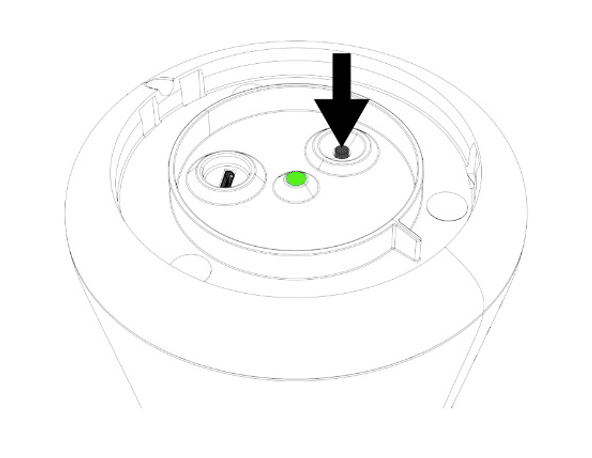
When you unplug the device after 5 seconds, ICO restarts and the LED flashes green 3 times. Repeat the above procedure to switch it off, respecting the connection time indicated.
Then replace the cover on your ICO and align the notch in the cover with the ICO keying lug. Do not allow ICO to come into contact with water if the cover is not properly closed. This will ensure that your device remains watertight.
Open your ICO application and click on the remote control icon at bottom right. Then press the switch off button and confirm.